
Views: 0 Author: Site Editor Publish Time: 2025-05-19 Origin: Site


In recent years, DIY décor projects have surged in popularity as people seek to personalize their living spaces with unique, budget-friendly, and creative touches. The satisfaction of crafting something with your own hands, combined with the ability to tailor designs to your taste, makes DIY a rewarding way to refresh your home or office.
Among the various materials and tools available to DIY enthusiasts, pebble lights stand out as an innovative and easy-to-use element that can transform ordinary projects into glowing masterpieces. These small, pebble-shaped LED lights are lightweight, versatile, and come in a range of colors and waterproof options, making them perfect for both indoor and outdoor use.
One of the most relaxing and aesthetically pleasing ways to incorporate pebble lights into your décor is by combining them with an indoor garden. This project not only enhances your green space but also adds a magical glow that makes your plants pop, especially during evenings.
Small potted plants or succulents
Pebble lights (preferably warm white or soft colors)
Decorative stones or pebbles
Glass terrarium or shallow bowls (optional)
Battery pack or plug-in power source
Choose Your Plants and Containers: Select low-maintenance indoor plants like succulents, air plants, or ferns. For a modern touch, consider using glass terrariums or decorative bowls.
Prepare the Base: Place a layer of decorative stones or natural pebbles at the bottom of your container to enhance drainage and aesthetics.
Arrange Plants and Lights: Plant your greenery, then gently weave pebble lights through the arrangement. For a natural look, place the lights so they peek out between leaves and soil, creating an ambient glow that highlights the plants’ textures.
Power and Placement: Connect your pebble lights to a battery pack or power source and hide wires discreetly. Position your glowing garden on shelves, side tables, or near windows to catch attention.
This DIY glowing garden project creates a calming corner in any room. The soft illumination from the pebble lights brings your plants to life after dark, making it perfect for bedrooms, living rooms, or workspaces. It’s a blend of nature and technology that promotes relaxation and adds a cozy vibe.
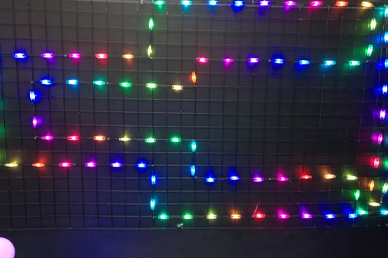
Pebble lights are perfect for creating custom illuminated wall art that can serve as a striking focal point or personal statement piece. Whether spelling out inspiring words or shaping abstract designs, pebble lights add dimension and light to your walls.
Pebble lights (multi-color or single color)
Mounting board or canvas
Pencil and ruler for sketching
Small hooks, adhesive strips, or wire clips
Optional: dimmer or smart controller for lighting effects
Design Your Pattern: Sketch your desired design on the mounting board or canvas. This could be a word, phrase, or simple shape like a heart, star, or wave.
Plan Light Placement: Mark points where each pebble light will be fixed. Ensure even spacing for a balanced look.
Secure the Lights: Attach the pebble lights using small hooks, wire clips, or strong adhesive strips. Take care to conceal wires for a clean finish.
Add Lighting Controls: If your pebble lights support dimming or color-changing, connect them to a compatible controller. This allows you to customize lighting moods for different occasions.
Mount and Enjoy: Hang your illuminated wall art in a prominent place like a living room, hallway, or office.
This project turns a simple wall into an engaging art installation that emits soft light and visual interest. The ability to customize colors and effects enhances versatility, letting you change the vibe from soothing white to vibrant party colors. Plus, the pebble shape adds an organic charm that differs from typical string lights or neon signs.
Transform your dining table or coffee table with elegant floating centerpieces featuring waterproof pebble lights. This project creates a luminous, ethereal effect that’s perfect for dinner parties, weddings, or quiet nights in.
Waterproof pebble lights (battery-operated preferred)
Large glass bowls or vases
Fresh or artificial flowers, floating candles, or decorative elements
Water (optional, depending on design)
Select Your Vessel: Choose clear glass bowls or vases with enough depth to submerge pebble lights and flowers comfortably.
Fill With Water or Decorative Base: For a classic floating effect, fill the container with clean water. Alternatively, use decorative sand or pebbles as a stable base.
Arrange Flowers and Lights: Place flowers, either fresh cut or artificial, in the container. Add pebble lights, ensuring they are fully waterproof and safely powered. If water is used, confirm the battery pack is sealed and protected.
Add Floating Candles or Accents: Enhance ambiance by adding floating candles or small ornaments. The pebble lights will reflect beautifully on the water’s surface.
Place on Table: Position your centerpiece where it can be admired from all angles.
Floating centerpieces bring a sophisticated glow to any setting. The waterproof nature of pebble lights allows safe integration with water and floral arrangements, creating captivating light reflections and shadows. This versatile décor is ideal for both everyday elegance and special occasions.
Give old or plain outdoor lanterns a modern upgrade by installing pebble lights inside them. This project revitalizes your garden, patio, or porch lighting with vibrant, energy-efficient illumination.
Outdoor lanterns (existing or new)
Waterproof pebble lights with remote control
Batteries or outdoor power source
Optional: weatherproof adhesive or mounting brackets
Choose Suitable Lanterns: Select lanterns that can easily be opened and have space to hold pebble lights safely.
Prepare Pebble Lights: Use waterproof pebble lights with a suitable power source for outdoor use. Ensure batteries are fresh or connect to outdoor-grade electrical outlets if possible.
Install the Lights: Place the pebble lights inside the lanterns, arranging them for even glow without blocking openings or ventilation.
Secure and Weatherproof: Use adhesive or mounting brackets to keep lights in place if necessary. Make sure the lantern door closes securely to protect electronics from weather.
Position and Control: Hang or place lanterns strategically around walkways, patios, or garden beds. Use remote controls to adjust brightness and colors as desired.
This DIY lantern makeover combines classic outdoor lighting charm with modern LED technology. Pebble lights provide customizable, vibrant light that enhances nighttime outdoor aesthetics. The weather-resistant nature of the lights ensures durability through seasons, making this a practical and stylish upgrade.
Pebble lights are the perfect year-round lighting element that can be customized for every season and holiday, allowing you to refresh your home décor without buying new accessories.
Multi-color pebble lights with control options
Seasonal decorations (garlands, ornaments, ribbons, etc.)
Hooks, adhesive strips, or decorative holders
Battery packs or power adapters
Install Base Lighting: Place pebble lights in key locations such as mantels, stair railings, window sills, or door frames.
Coordinate Seasonal Decorations: Add garlands, wreaths, or themed décor around the pebble lights. For Christmas, combine with red and green ornaments; for Halloween, use orange and purple accents.
Customize Colors and Effects: Use remote controls or apps to shift the pebble lights’ colors and patterns to match the current holiday or season.
Refresh as Needed: Change decorations and lighting modes easily, ensuring your home always feels festive and inviting.
This project maximizes the value of your pebble lights by turning them into a versatile foundation for holiday décor. The ability to switch colors and effects means one set of lights can work beautifully throughout the year, adapting to celebrations and seasons with ease.
Pebble lights offer endless creative possibilities for DIY décor projects. Their organic design, energy efficiency, and customizable colors make them an ideal lighting choice to add personality and warmth to any space. Whether you want to create a glowing indoor garden, illuminated wall art, floating centerpieces, refreshed outdoor lanterns, or a dynamic holiday décor system, pebble lights provide a simple yet effective way to elevate your home environment.
Ready to start your DIY lighting adventure? Explore a variety of high-quality pebble lights at RainMin and discover products designed for easy use, durability, and stunning effects. With pebble lights, your creativity can shine bright — literally.